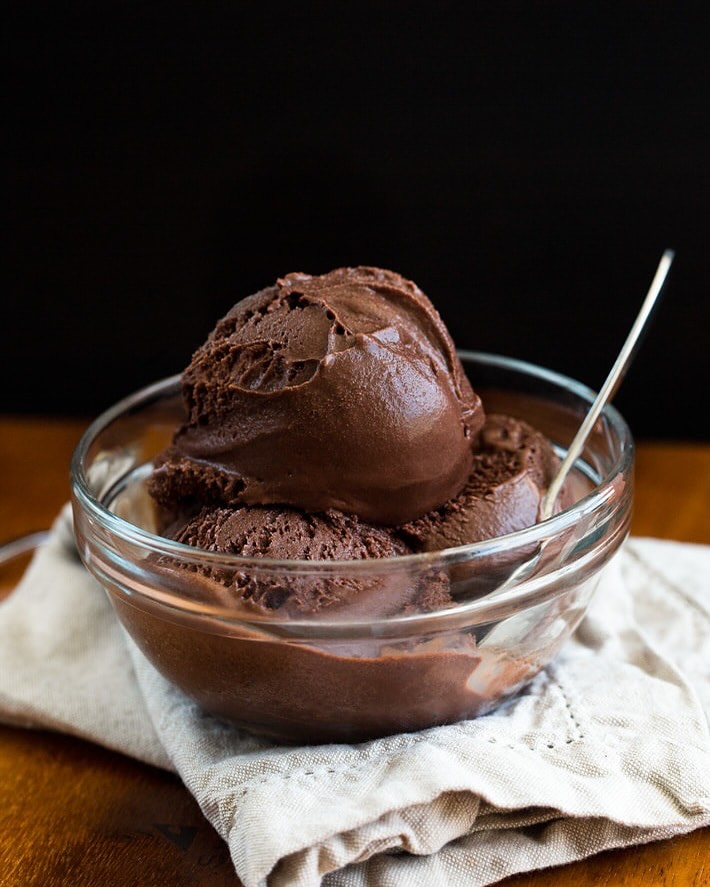
Is there anything better than a bowl of rich, creamy chocolate ice cream on a hot day—or any day, for that matter? Now imagine being able to make that indulgent treat in just minutes, with no ice cream maker, no long ingredient list, and absolutely no fuss. Sounds too good to be true? It’s not.
This 3-ingredient homemade chocolate ice cream recipe is a game-changer. Whether you’re a seasoned home cook or someone who usually sticks to boxed brownie mixes, this simple method will have you scooping out velvety, chocolatey goodness from your own freezer in no time. It’s perfect for spontaneous cravings, last-minute dessert needs, or impressing guests with minimal effort.
You don’t need eggs, fancy machines, or hours of prep. Just three ingredients you probably already have in your kitchen, a hand mixer or a whisk, and a container to freeze it in. That’s it. The result? A luscious, soft-serve-style ice cream that’s every bit as satisfying as the store-bought stuff—without the additives or preservatives.
Let’s dive in and learn how to whip up this dangerously easy dessert.
Ingredients

Before you get started, make sure you have these three simple ingredients on hand:
- 2 cups (480 ml) heavy whipping cream
- 1 (14 oz or 397 g) can of sweetened condensed milk
- ½ cup (50 g) unsweetened cocoa powder
That’s all! No churning, no eggs, no stabilizers—just pure, creamy chocolate magic.
Want to personalize your ice cream? Consider mixing in:
- Mini chocolate chips or chunks
- Swirls of peanut butter or Nutella
- Crushed cookies
- Sea salt and caramel drizzle
- A splash of vanilla or espresso extract
But honestly, even in its basic form, this recipe is decadent enough to stand on its own.
Equipment You’ll Need
You don’t need an ice cream maker, but a few basic tools will help:
- Mixing bowl
- Hand mixer, stand mixer, or whisk
- Spatula
- Freezer-safe container with lid
If you want perfectly scoopable results, a metal loaf pan works beautifully.
Step-by-Step Instructions
1. Whip the Cream
Start by pouring the heavy whipping cream into a chilled mixing bowl. Using a hand mixer (or a whisk, if you’re up for a workout), beat the cream until stiff peaks form. This means when you lift the beaters, the cream stands up firmly on its own.
2. Mix Cocoa with Sweetened Condensed Milk
In a separate bowl, combine the sweetened condensed milk with the unsweetened cocoa powder. Stir until smooth and well blended. The mixture should be thick and glossy, almost like chocolate fudge.
Tip: Sift your cocoa powder first to avoid lumps and ensure a smoother mix.
3. Fold Everything Together
Using a spatula, gently fold the whipped cream into the chocolate-condensed milk mixture. Do this in batches to maintain the airiness of the whipped cream. The goal is to keep the mixture light and fluffy for that soft, creamy texture.
Don’t overmix! A gentle folding motion works best here.
4. Transfer and Freeze
Pour the mixture into your freezer-safe container, smoothing out the top. Cover tightly with a lid or plastic wrap.
Freeze for at least 4–6 hours, or overnight for firmer scoops. For soft-serve consistency, 4 hours is usually enough.
How to Serve It
Once fully frozen, let the ice cream sit at room temperature for 3–5 minutes to soften slightly before scooping. Use a warm spoon or ice cream scoop for best results.
Serve in a bowl, a cone, or sandwich it between cookies. Drizzle with chocolate syrup, sprinkle with sea salt, or top with berries for extra flair.
Why This Recipe Works
This easy recipe uses the science of no-churn ice cream, relying on the whipped cream for airiness and the condensed milk for sweetness and smooth texture. The cocoa powder gives it a deep, dark chocolate flavor without the need for melting or tempering actual chocolate bars.
Here’s what makes this method a winner:
- No churn, no mess: No need for bulky appliances or rock salt.
- Fast prep: Less than 10 minutes of hands-on time.
- Super creamy texture: The whipped cream mimics the texture of churned ice cream.
- Customizable: Endless variations and add-ins possible.
Storage Tips
Keep your homemade ice cream in an airtight container in the freezer for up to 2 weeks. After that, it may start to develop ice crystals, but it’s usually long gone before then!
If storing in a metal loaf pan, press a layer of parchment paper or plastic wrap directly onto the surface before covering to prevent freezer burn.
Leave a comment