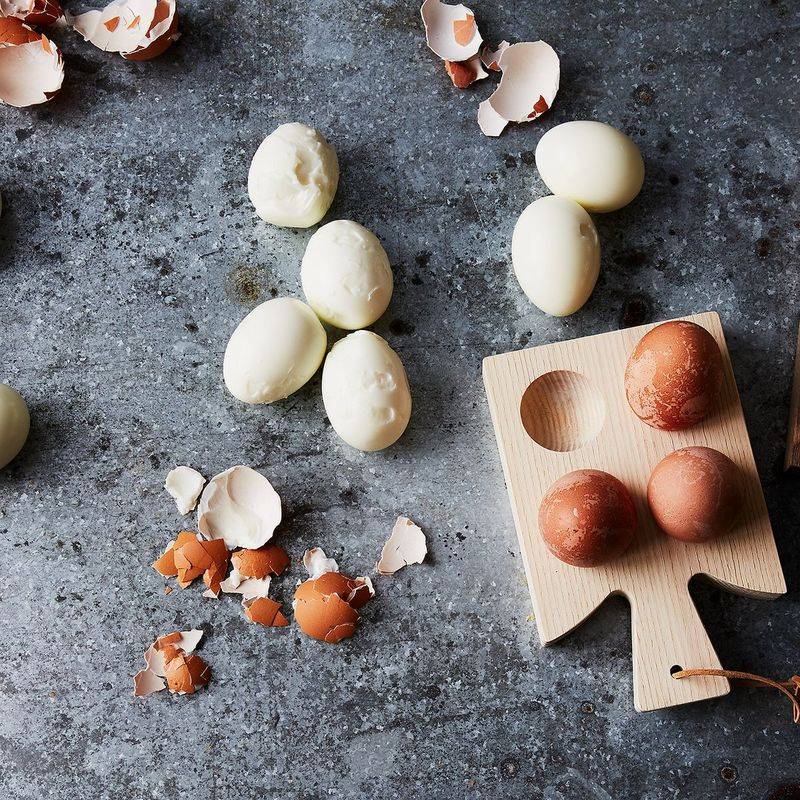
Hard-boiled eggs are a simple, protein-packed snack, but peeling them can turn into a frustrating mess of shell fragments and mangled egg whites. Most of us have experienced the disappointment of eggs that refuse to peel cleanly, leaving us with pitted, ugly eggs.
The good news is that achieving perfectly peeled eggs isn’t about luck—it’s about technique.
1. Using Fresh Eggs
Fresh eggs cling stubbornly to their shells, making your peeling experience a frustrating exercise in patience. The membrane in new eggs hasn’t had time to separate from the shell wall, creating a tight bond that fights your every peeling attempt.
Older eggs develop a higher pH level and absorb more air through their porous shells. This natural aging process causes the membrane to detach more easily from both the shell and the egg white.
For smooth peeling, store your eggs for 7-10 days before boiling them. If you’re in a hurry and only have fresh eggs, add a teaspoon of baking soda to your cooking water—it raises the pH artificially and helps replicate the easier-peeling conditions of older eggs.
2. Not Shocking in Cold Water
Skipping the cold water plunge after boiling is a common mistake that ruins perfectly good eggs. Without this crucial cooling step, residual heat continues cooking your eggs, creating that unappetizing green ring around the yolk while the whites bond tightly to the shell membrane.
The rapid temperature change from hot to cold causes the egg to contract inside the shell. This contraction is your secret weapon—it helps separate the egg from the membrane, making peeling dramatically easier.
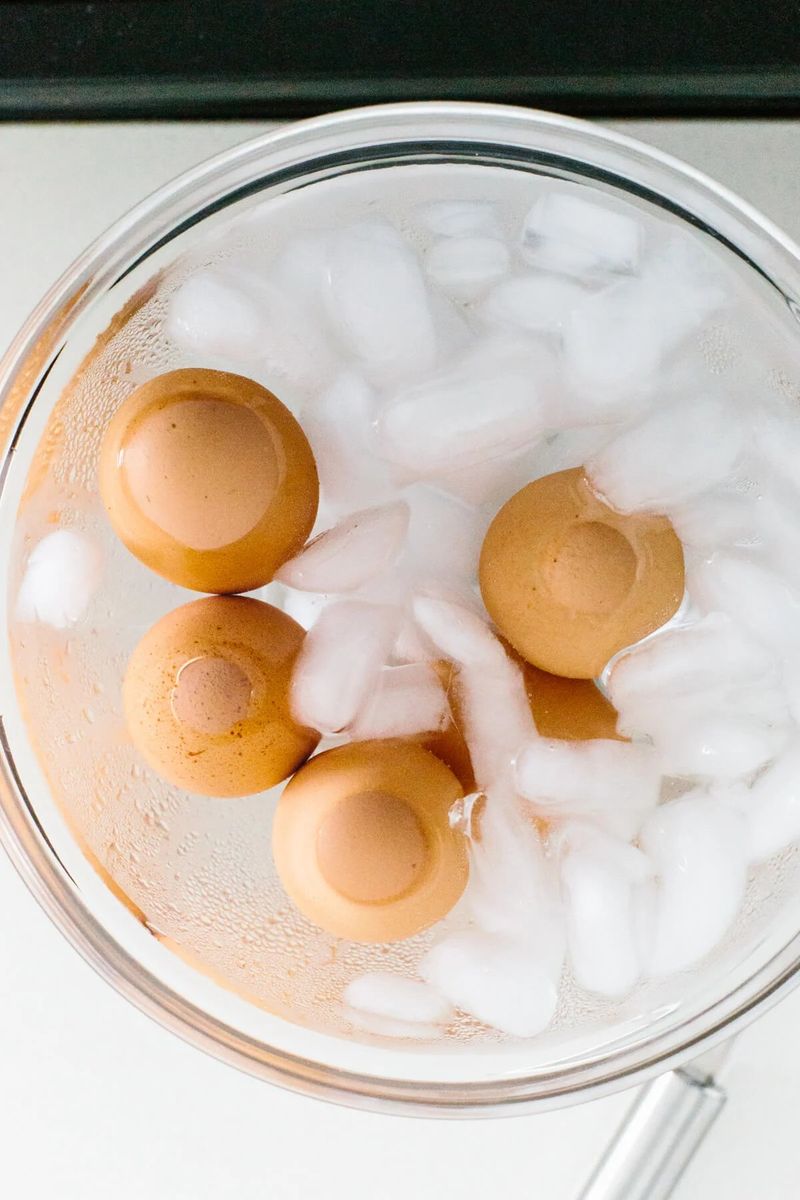
Fill a bowl with ice and water before your eggs finish cooking. As soon as your timer beeps, transfer them directly to this ice bath and let them chill for at least 5 minutes, though 10 minutes works even better for truly effortless peeling.
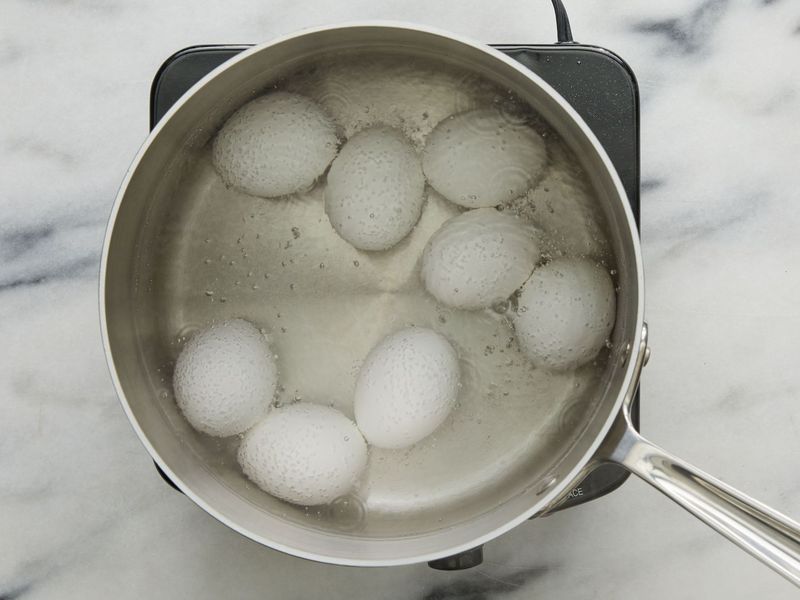
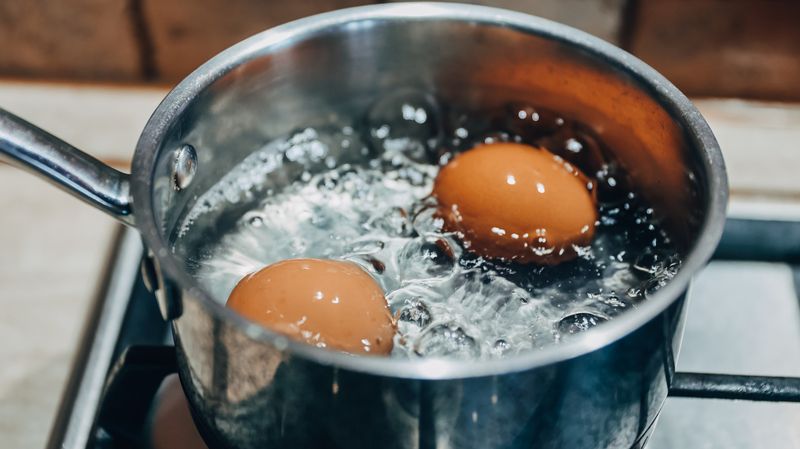
3. Boiling Instead of Simmering
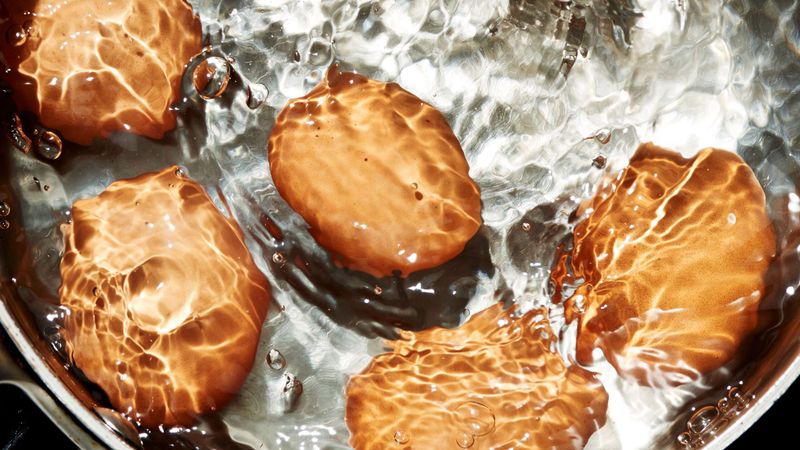
Aggressive boiling creates turbulence that tosses eggs around like they’re in a washing machine. The violent bubbling causes eggs to crack against each other and the pot, allowing egg white to leak out and harden into those annoying crusty bits that make peeling a nightmare.
A gentle simmer provides even, consistent heat without the damaging turbulence. Your eggs cook more evenly from edge to center, preventing the whites from becoming rubbery while ensuring the yolks reach the perfect doneness.
Start by bringing your water to a full boil, then reduce the heat until you see just a few small bubbles rising to the surface. This gentle approach might take a minute longer, but your eggs will thank you with shells that practically slide off when it’s time to peel.
4. Overcooking the Eggs
Leave eggs boiling too long and you’ll create a peeling disaster. Overcooked eggs develop tough, rubbery whites that bond stubbornly to the shell membrane, fighting your peeling efforts every step of the way.
That unappetizing greenish-gray ring around overcooked yolks isn’t just unattractive—it’s a sulfur compound that forms when iron in the yolk reacts with hydrogen sulfide from the white. This chemical reaction happens when eggs spend too much time at high temperatures.
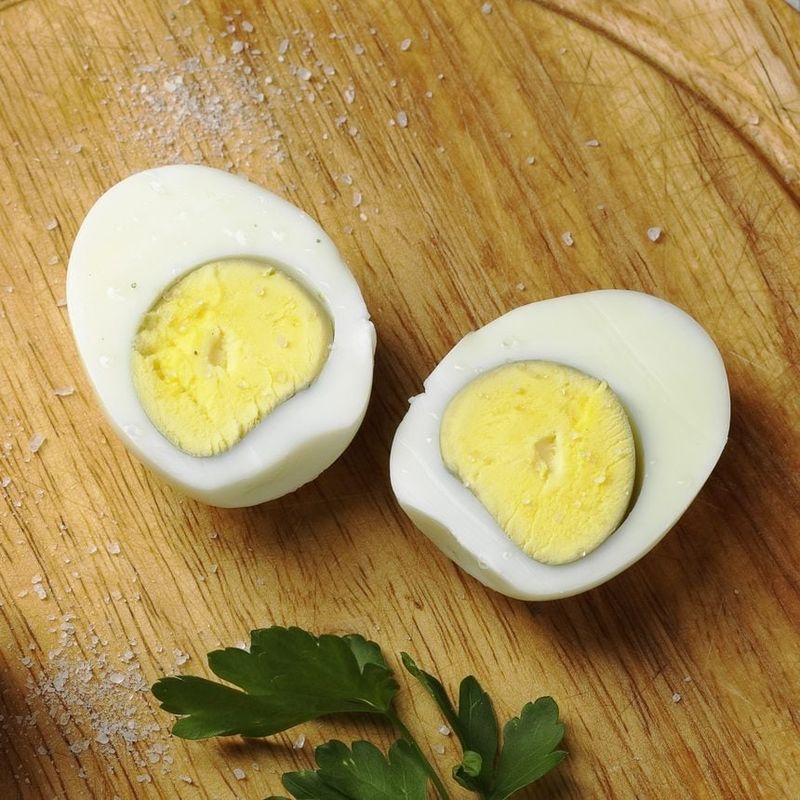
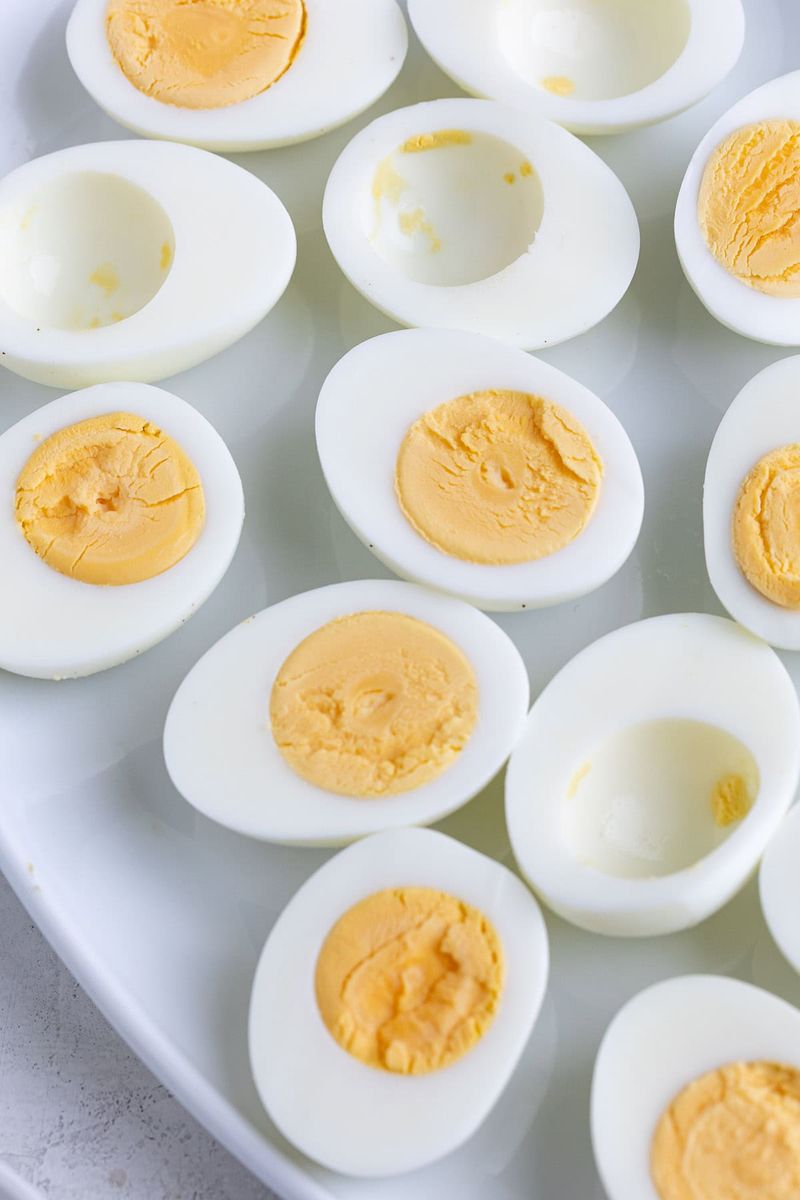
Perfect timing depends on your egg size and altitude. For large eggs at sea level, aim for 9 minutes for jammy yolks or 12 minutes for fully set centers. Set a timer the moment your eggs enter the water, and remember that even a minute too long can make the difference between easy and difficult peeling.
5. Starting with Cold Water
The traditional method of placing eggs in cold water before heating creates a peeling nightmare. Slow temperature increases allow proteins in the egg white to bond gradually and firmly to the inner membrane, creating that frustrating situation where half your egg white comes off with the shell.
Hot-start methods shock the egg proteins, causing them to contract quickly and cleanly away from the membrane. This temperature differential is your ally in the battle for smooth peeling.
Bring your water to a full boil first, then reduce to a simmer before gently lowering your eggs in with a slotted spoon. This approach might seem counterintuitive if you’ve always used the cold-start method, but the difference in peeling ease is remarkable—you’ll wonder why you ever did it the old way.
6. Not Cracking the Shell Before Cooling
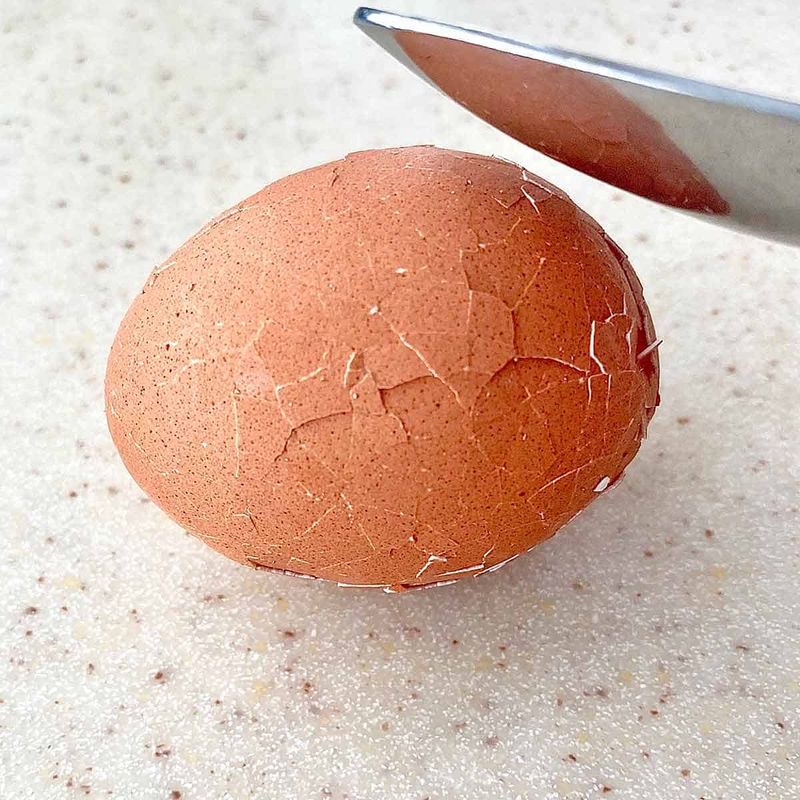
Missing this simple pre-cooling step creates a vacuum effect that works against you. As the egg cools with an intact shell, it contracts and creates suction that pulls the membrane tight against the egg white, cementing them together in a peeling nightmare.
Cracking the shell before cooling breaks this vacuum seal and allows cold water to seep between the shell and egg. This water acts as a lubricant, sliding between the membrane layers and making your peeling job significantly easier.
After removing eggs from heat but before placing them in the ice bath, gently tap each egg on the counter to create small cracks around the shell. Don’t peel yet—just crack. Then submerge them in your ice bath, allowing the cold water to penetrate those cracks and work its separating magic for 5-10 minutes.
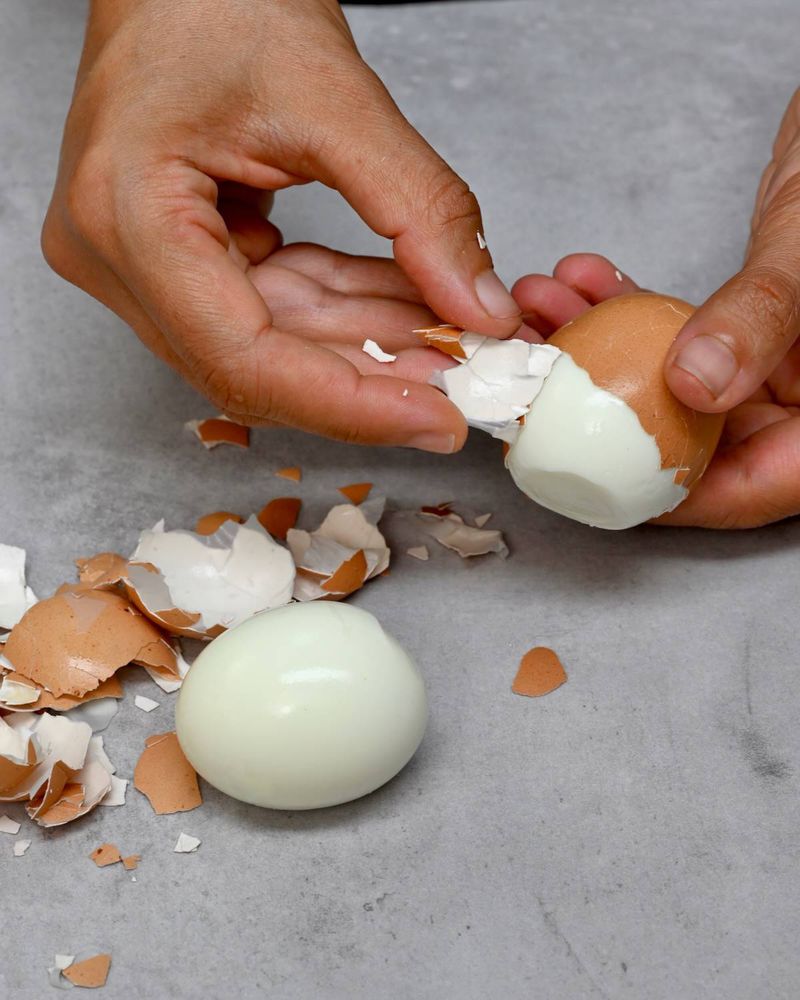
7. Peeling Without Rolling
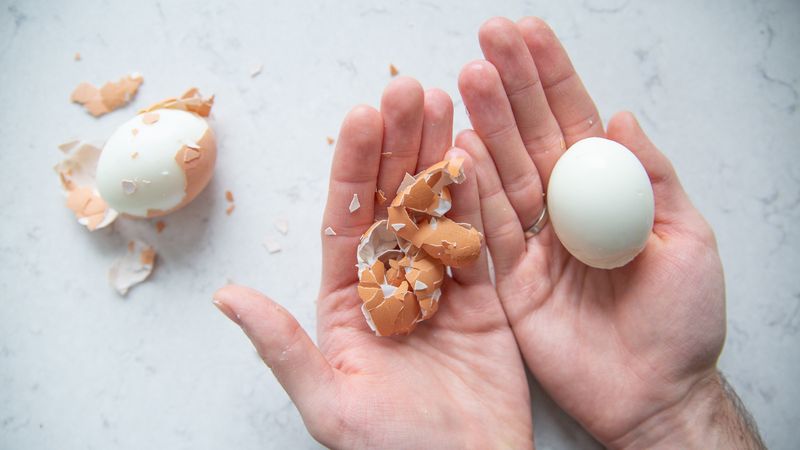
Attacking an egg with just your fingertips leads to frustration as you pick off tiny fragments one by one. The shell breaks into countless sharp pieces that dig into your fingertips while stubbornly clinging to the egg white.
Rolling creates a network of cracks that allows you to remove the shell in larger sections. This web of fractures breaks the membrane’s hold in multiple places simultaneously, making the entire peeling process faster and more efficient.
Place your cooled egg on the counter and gently roll it under your palm with light pressure. You’ll feel and hear the shell cracking all around the egg. This 10-second step saves minutes of painstaking peeling and helps preserve the smooth surface of your egg white instead of leaving it pocked with shell-shaped divots.
8. Not Peeling Under Running Water
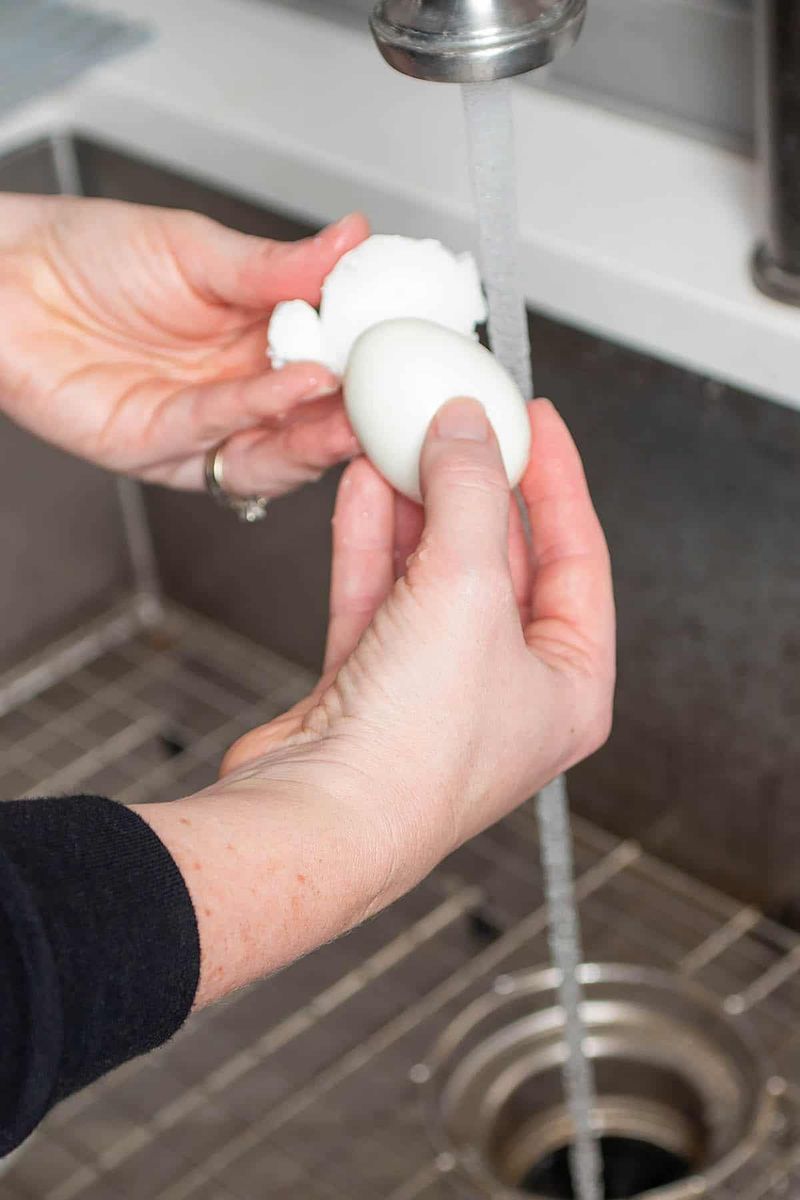
Peeling eggs in dry conditions creates a messy battle between shell fragments and sticky membranes. Without water as a lubricant, the membrane clings tenaciously to both shell and egg white, forcing you to choose between leaving membrane attached or tearing away chunks of white.
Water serves as both separator and rinser during peeling. It flows between the shell and egg, helping lift away the membrane while simultaneously washing away tiny shell fragments that would otherwise stick to your egg.
Hold your cracked egg under a gentle stream of cool running water as you peel. Start at the wide end where the air pocket creates a natural separation point, and let the water flow under the shell as you work. This technique is especially helpful for those stubborn eggs that seem determined to keep their shells as a permanent attachment.
9. Not Adding Salt or Vinegar to Boiling Water
Plain water doesn’t do your eggs any favors during the boiling process. Without additives, egg whites leak through tiny cracks and create those frustrating white streamers that harden on the shell and make peeling a nightmare.
Salt and vinegar serve as protein coagulants, helping egg whites solidify quickly if they leak through small cracks. This rapid coagulation prevents extensive leaking and creates a barrier that keeps the rest of the egg contained within the shell.
Add one teaspoon of white vinegar or salt (or both) to your boiling water before adding eggs. The vinegar’s acidity also helps dissolve some of the calcium carbonate in the eggshell, making it softer and easier to remove later. Don’t worry—the amount is too small to affect the egg’s flavor, but just right to improve your peeling experience.
10. Skipping the Ice Bath Entirely

Letting eggs cool naturally on the counter is a recipe for peeling disaster. Without rapid cooling, the egg continues cooking from residual heat, resulting in overcooked, rubbery whites and yolks with that unappealing greenish ring.
The ice bath serves multiple crucial functions beyond just stopping the cooking process. The thermal shock causes the egg to contract quickly inside the shell, pulling away from the membrane. This separation is the key to easy peeling.
Prepare your ice bath before you start cooking so it’s ready the moment your eggs are done. Use plenty of ice—not just cold water—and ensure eggs are completely submerged. The temperature difference needs to be dramatic for the best results, so aim for a proper ice bath rather than just cool tap water. Your eggs should spend at least 5 minutes in this chilly dip.
11. Trying to Peel Right After Boiling
Impatience leads to burned fingers and mangled eggs when you attempt to peel them while they’re still hot. Fresh from boiling, the egg white hasn’t yet set completely and remains soft enough to tear easily under your fingers.
Cooling serves two essential purposes in the perfect egg-peeling process. First, it allows the proteins in the egg white to fully set and firm up, making them less likely to tear. Second, it creates that crucial contraction that separates the egg from its membrane.
After the ice bath, either peel your eggs immediately or refrigerate them for later use. Eggs actually become easier to peel after complete cooling, not harder as many believe. If you’re preparing eggs for a gathering, consider peeling them all at once after cooling rather than storing them in their shells—they’ll be ready to use and won’t become more difficult to peel over time.
12. Not Gently Tapping the Wide End First
Random cracking anywhere on the egg shell leads to difficult, piecemeal peeling. Most eggs contain a small air pocket at the wider end—a natural starting point that many people overlook.
The air pocket creates a natural separation between the shell and the egg white. This gap gives you an easy entry point where the membrane is already detached, allowing you to get under the shell without digging into the egg white.
Hold your cooled egg with the wide end facing up and firmly tap it on the counter. Once cracked, pinch and remove that small section of shell, then slide your thumb under the membrane. From this starting point, you can often remove large sections of shell in a spiral pattern around the egg. Some lucky peelers can even remove the entire shell in one piece using this method!
13. Ignoring the Egg’s Age Before Boiling
Grabbing eggs straight from the grocery store for immediate boiling sets you up for a frustrating peeling experience. Freshly laid eggs have a protective coating and lower pH that causes the membrane to grip tightly to both the shell and the egg white, creating a perfect storm for peeling problems.
The aging process naturally increases the egg’s internal pH as carbon dioxide escapes through the porous shell. This chemical change weakens the bond between the membrane and egg white, while the egg also develops a larger air pocket as moisture evaporates through the shell.
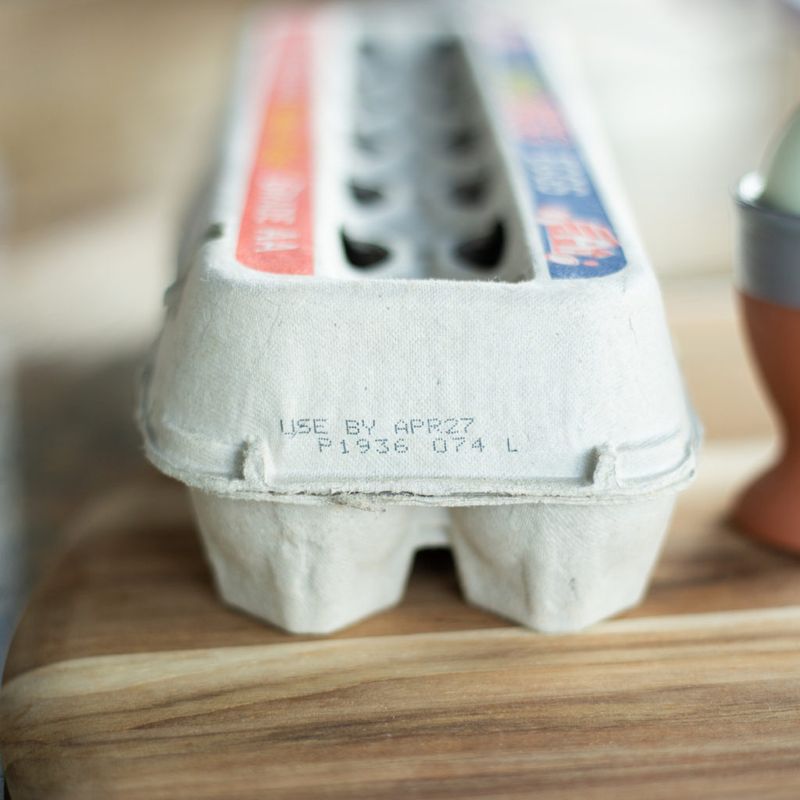
Check the packing date on your egg carton (usually a three-digit number representing the day of the year). For easiest peeling, use eggs that are at least a week old. If your recipe calls for hard-boiled eggs, plan ahead by buying eggs a week before you need them.
Leave a comment